

Migrating a WordPress website can feel overwhelming — especially if you’re worried about downtime, losing data, breaking your design, or affecting your SEO rankings. The good news? A safe and zero-downtime migration is completely achievable with the right preparation and step-by-step process.
This Website Migration Guide (2025) gives you a complete, practical, and WordPress-focused plan to move your site to a new hosting provider without breaking anything. From pre-migration checklists and DNS switching to redirect planning, SEO validation, and troubleshooting — every crucial point is covered in this guide so your migration stays safe, fast, and error-free.
Whether you’re switching hosts for better performance, upgrading to LiteSpeed/NVMe, or moving a WooCommerce store, this guide ensures you complete the migration smoothly without losing visitors, orders, or rankings.
In This Article
Key Highlights
A zero-downtime migration is fully achievable using TTL reduction, A-record switching, and blue/green staging.
WordPress migrations require extra steps (plugins, database, caching, WooCommerce, wp-config).
Proper URL mapping and 301 redirects prevent SEO loss, 404s, and ranking drops.
DNS switching must be done carefully to avoid email disruption or mixed content issues.
After migration, SEO validation (redirect testing, sitemap submission, canonicals, analytics) is essential.
WP Swift provides free expert migration, LiteSpeed Enterprise servers, NVMe storage, and a $1 first-month plan for safe testing.
What Is Website Migration?

A website migration is the process of moving your website from one environment to another—such as changing your hosting provider, switching domains, redesigning the site, or restructuring URLs—while ensuring that performance, SEO, and user experience remain intact.
In simple terms, a website migration means your website shifts to a new place, but your visitors should still access it normally and your Google rankings should remain stable.
Because a website includes many interconnected elements (files, database, URLs, SEO settings, analytics, caching, CDN, email, DNS, and more), a migration is not just a “copy-paste” process. Even a small mistake can lead to broken links, traffic loss, and downtime.
Why Website Migration Matters
A migration directly affects:
- Search visibility (Google indexing & keyword rankings)
- Website speed and performance
- URL structure & backlinks
- User experience (downtime or slow loading)
- Security & SSL configuration
- Analytics tracking (GA4, GSC)
- WooCommerce order flow (if applicable)
A poorly executed migration can result in:
- 404 pages
- missing URLs
- broken redirects
- SEO drops
- plugin/theme conflicts
- mixed content/SSL errors
- slow page loads
- email downtime
- checkout failures on eCommerce sites
This is why a structured migration plan — especially using a zero-downtime strategy — is essential for WordPress users.
Types of Website Migrations

A website migration can take several forms depending on what exactly is being changed. Understanding these types helps you plan correctly and prevent issues such as broken URLs, lost rankings, or downtime.
Below are the most common types of migrations—explained clearly so users know exactly which category their situation falls into.
1. Hosting Migration (Server-to-Server Transfer)
Moving your website from one hosting provider to another (e.g., Bluehost → WP Swift).
This guide focuses heavily on this type, especially for WordPress users.
Common triggers:
- slow hosting
- downtime issues
- high renewal prices
- need for LiteSpeed/NVMe servers
- poor support
This is the most popular migration scenario.
2. Domain Migration (URL Change)
When your main website address changes, such as:
- example.com → newexample.com
- .net → .com
- changing brand name or business identity
This requires careful redirect planning and is high-risk for SEO.
3. Platform/CMS Migration
When you switch the underlying system, such as:
- Wix → WordPress
- Shopify → WooCommerce
- Custom PHP → WordPress
This is complex because content, design, and URLs all change.
4. Site Structure or Directory Migration
In this case, your domain stays the same, but your internal URL structure changes.
Examples:
- /blog/post-name → /articles/post-name
- removing category prefixes
- cleaning URL slugs
Requires URL mapping + 301 redirects.
5. Design or Theme Migration
When the appearance or front-end structure is changed—especially in WordPress.
Examples:
- switching from Elementor → Gutenberg
- redesigning entire pages
- performance-focused rebuild
Can trigger layout shifts, SEO issues, and indexing challenges.
6. Protocol Migration (HTTP → HTTPS)
If you’re enabling SSL or moving fully to HTTPS.
Google treats this like a migration because:
- URLs change
- indexing changes
- redirects must be configured
7. Server Technology Migration
When your hosting provider upgrades or changes:
- Apache → LiteSpeed
- shared hosting → VPS
- older PHP → PHP 8.x
- HDD → NVMe
- no-cache setup → LiteSpeed Cache/CDN
This impacts performance and sometimes compatibility.
Why Website Migrations Fail (Top SEO & Technical Risks)
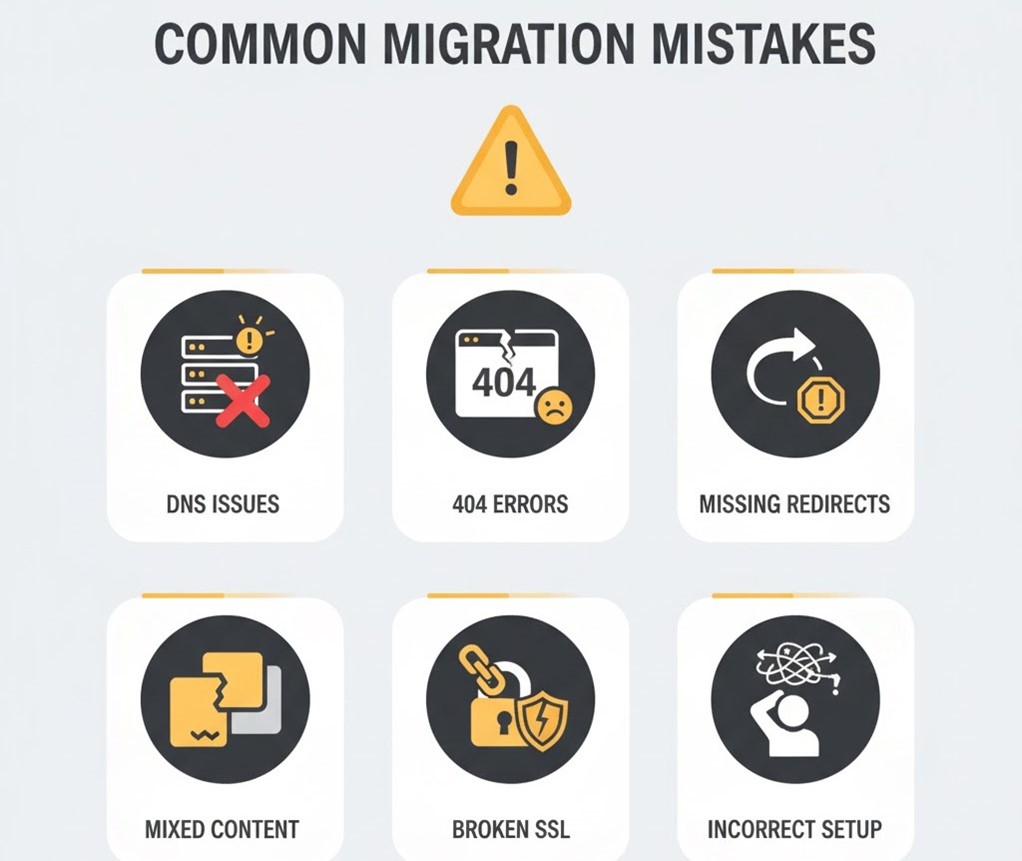
A website migration can significantly improve performance and stability — but only if handled correctly. Most failures happen because website owners underestimate how many moving parts are involved in a migration.
Below are the most common reasons migrations fail, based on real-world hosting and WordPress scenarios.
1. Incorrect or Missing 301 Redirects
One of the biggest reasons websites lose traffic after migration is broken or incomplete redirect mapping.
Common issues:
- Old URLs not redirected to new URLs
- Redirect chains (301 → 301 → 301)
- Wrong redirect type (302 instead of 301)
- Missing trailing slash consistency
- Case-sensitive mismatches
- Missing redirects for tag/category archives
Impact:
- ⚠ Loss of Google rankings
- ⚠ 404 errors
- ⚠ Broken backlinks
- ⚠ Poor user experience
2. Poor DNS Handling (Propagation Mistakes)
DNS is often misunderstood — and mishandled.
Common mistakes:
- DNS updated without reducing TTL
- Changing nameservers instead of A Record when not needed
- Email MX records overwritten
- Checking DNS from only one region
- Not verifying propagation before going live
Impact:
- ⚠ Downtime
- ⚠ Some visitors see old site, others see new
- ⚠ Email disruption
3. Missing or Broken Internal Links
After migration, internal links sometimes point to:
- old domain
- incorrect directory
- staging URLs
- HTTP instead of HTTPS
This confuses crawlers and breaks user navigation.
4. Broken Media, Images, and File Paths
Common in WordPress migrations:
- wp-content/uploads missing
- incorrect file permissions
- broken image URLs
- CDN links not updated
- mismatched upload paths in database
Impact:
- ⚠ Poor user experience
- ⚠ SEO score drops (LCP impacted)
5. Database Search & Replace Issues
When changing domains or paths:
- Serialized strings break if poorly replaced
- Plugins or theme options corrupt
- Homepage URL mismatch
- Permalink structure resets unexpectedly
Only WordPress users face this issue — and most competitors don’t cover it.
6. Misconfigured SSL After Migration
SSL issues commonly appear as:
- Mixed content warnings
- Temporary HTTP fallback
- Browser security alerts
- Wrong certificate installed
- Domain mismatch
Google heavily penalizes insecure pages.
7. SEO Settings Not Carried Over
Often forgotten during migration:
- robots.txt changes
- missing noindex → index settings
- canonical tags pointing to old URLs
- sitemap links still pointing to old domain
- GA4, GSC, Pixel, or tracking scripts missing
- schema markup broken
- hreflang conflicts (if multilingual)
8. Plugin & Theme Conflicts
Especially when hosting tech changes:
- Caching plugins misbehave (LiteSpeed, WP Rocket, etc.)
- Security plugins block access
- Page builders break (Elementor, Divi)
- WooCommerce checkout errors
- PHP version incompatibilities
9. Email Downtime
Email failures happen when:
- MX records overwritten
- Incorrect DKIM/SPF/DMARC
- Webmail not configured
- Host-based email → third-party email mismatch
Many users panic because “website migrated but emails stopped working.”
10. Not Testing After Migration
Most failures happen because testing is ignored.
You must test:
- links
- forms
- checkout
- login
- speed
- sitemap
- redirects
- analytics
- caching
- CDN
Skipping this leads to expensive SEO losses.
Zero-Downtime Migration Explained (How It Actually Works)

A zero-downtime migration means moving your WordPress website to a new host without users ever seeing an error page, slowdown, or maintenance screen. For the best results, your site should run on a fast WordPress hosting environment.
This is possible through a combination of DNS timing, staging environments, and controlled switching between the old and new servers.
Zero-downtime matters because downtime directly affects:
- conversions
- user trust
- SEO health
- session drops
- revenue (for WooCommerce stores)
Below is a clear explanation of how zero-downtime migration works, without technical confusion.
1. DNS TTL Reduction (Time-To-Live Control)
TTL is the time your DNS records are cached worldwide.
Most hosting companies set TTL to 1–24 hours by default.
To achieve zero downtime:
Step: Reduce TTL to 300 seconds (5 minutes)
This ensures that when you switch DNS to the new host, global visitors switch to the new server within minutes, not hours.
Why this matters:
- Old and new servers won’t show inconsistent versions
- SEO crawlers won’t get mixed responses
- You avoid those “some users can’t see the site” issues
This first step alone solves 70% of downtime problems.
2. Create a Staging Environment (Blue/Green Strategy)
The safest method for WordPress migrations is the blue/green deployment style:
- Blue = old server (live)
- Green = new server (staging copy)
Process:
- Clone your site to the new host
- Review everything: plugins, theme, URLs, SSL
- Test forms, checkout, speed
- Fix any errors
- Keep both versions running temporarily
Users still view the old live site while you prepare the new one behind the scenes.
This ensures no “surprises” during the actual switch.
3. Freeze Dynamic Content Temporarily (Only for eCommerce)
For WooCommerce or membership sites:
- pause order creation
- pause registrations
- pause content submissions
Because new data added during migration can get lost.
Most hosts (including WP Swift) can:
- temporarily disable checkout
- or sync new orders manually after migration
This prevents database mismatch.
4. Switch DNS Carefully (A Record Recommended)
To avoid downtime:
Use A Record changes (NOT nameserver changes)
- Nameserver changes = full DNS propagation (slow, risky)
- A Record change = direct server switch (faster, safer)
This is the #1 mistake beginners make.
When you change the A Record to the new IP:
- Global visitors begin seeing the new hosting environment
- TTL ensures fast propagation
- Email records remain intact (no email downtime)
This is the actual “moment of switch” — and it takes seconds, not hours.
5. Keep Both Servers Active Until Propagation Is Complete
Even after DNS switches:
- Keep the old site active for 24–48 hours
- Do not delete files or suspend hosting
- Do not remove the old database
- Do not close old account immediately
Why?
Because some regions still see the old server for a short while.
Zero downtime = both servers stay active simultaneously until no region is pointing to the old one.
6. Verify With Global DNS Tools
After switching DNS, you must test globally:
- WhatsMyDNS
- DNSChecker
- Cloudflare DNS Tool
Check both:
- A Record
- WWW
- non-WWW
Zero downtime means no location returns “unresolved” or “old IP” after a few minutes.
7. Final Cutover Once Everything is Stable
After propagation is confirmed:
- Turn off old site/WP cron jobs
- Disable old CDN links
- Move emails if needed
- Turn checkout back on (if WooCommerce)
At this point — migration is fully complete without any interruption for users.
Pre-Migration Checklist (Planning Stage)

A successful migration begins long before files or databases move.
This stage ensures your WordPress site, URLs, hosting environment, analytics, and DNS settings are fully prepared.
This checklist reduces 90% of migration errors — especially downtime, broken URLs, and ranking drops.
1. Benchmark Your Current Website (Speed, SEO, Uptime)
Before migrating, measure your site’s existing performance so you can compare results afterward.
If you’re using cPanel, you can also benefit from built-in cPanel hosting tools that simplify backups and server checks.
Check:
- Speed metrics: TTFB, LCP, FID (PageSpeed Insights / GTmetrix)
- Uptime: Last 24–48 hours (UptimeRobot)
- SEO status: Indexed pages, top keywords, ranking trends (Search Console)
- Crawlability: Duplicate pages, broken links (Screaming Frog / Sitebulb)
Why this matters:
If anything breaks after migration, you’ll know exactly what changed.
2. Crawl Your Website & Create a Content Inventory
A full crawl reveals:
- all URLs (including hidden ones)
- redirects
- broken links
- orphan pages
- category/tag archives
- attachment pages
- canonical setup
Tools: Screaming Frog / Xenu / Ahrefs site audit.
This becomes your URL Mapping Master Sheet, used for redirect planning.
3. Identify All Dependencies & External Services
Most people forget this step — and then forms, emails, or payment systems break.
List all dependencies:
WordPress-level
- Plugins
- Themes
- Custom code
- API connections
- WooCommerce payment gateways
- Cache plugins
- Security plugins
- Membership plugins
- LMS tools
Server-level
- Cron jobs
- Email routing (MX, DKIM, SPF, DMARC)
- CDN (Cloudflare / BunnyCDN / QUIC.cloud)
- DNS management
- IP allowlists (security firewalls)
Integration-level
- GA4
- Search Console
- Facebook Pixel
- Marketing automation (FluentCRM / Mailchimp)
- CRM integrations
- Stripe/Klarna/PayPal webhooks
This step ensures nothing “breaks silently” after migration.
4. Create a Full Backup (Files + Database + Email)
Minimum required backups:
- wp-content folder
- full site files
- full database (SQL)
- email backups (if hosting email)
- DNS zone backup (export from old host)
- cPanel/DirectAdmin full backup if available
Pro Tip:
Take 2 backups:
- one manual (via cPanel/File Manager)
- one using a WordPress plugin (Duplicator / UpdraftPlus)
This gives you two restore options in case something goes wrong.
5. Verify Backup Integrity (Critical Step Most Users Skip)
A backup is only useful if it works.
Test your backup by:
- importing DB into a test database
- opening wp-content archive
- checking uploads folder size
- verifying no corrupted SQL tables
- ensuring large file types (PDF, videos) exist
This avoids “backup failed” disasters during migration.
6. Prepare the New Hosting Environment
Before migration, your new server (WP Swift) must be fully configured.
Check:
- PHP version compatibility (7.4/8.0/8.1/8.2)
- Database version (MySQL/MariaDB)
- LiteSpeed Cache availability
- SSL ready (auto-install)
- SFTP / File Manager access
- Database user privileges
- Temporary URL or staging URL available
If any mismatch exists → fix BEFORE migration.
7. Reduce DNS TTL to 300 Seconds (5 Minutes)
This ensures zero-downtime switching later.
Do this 24–48 hours before DNS switch.
If the domain uses:
- Cloudflare → change TTL there
- cPanel DNS → change A Record TTL
- External registrar → edit DNS zone
DNS TTL reduction makes your switch fast, safe, and global.
8. Set Migration Timing (Low-Traffic Hours Recommended)
Choose a migration window when:
- users are least active
- no campaigns or sales are running
- WooCommerce orders are minimal
- content editors are offline
Ideal windows:
- 1 AM – 6 AM (based on your main customer timezone)
9. Freeze New Content (If WordPress Has Dynamic Activity)
For blogs → optional
For WooCommerce → critical
Freeze:
- checkout
- product editing
- order creation
- new posts/pages
- comments (optional)
This prevents “data mismatch” between old and new servers.
WordPress-Specific Migration Preparation

WordPress migrations require additional steps beyond standard website transfers because your site depends on:
- plugins
- themes
- database serialization
- media directories
- caching layers
- cron jobs
- WooCommerce order tables
- URL references inside the database
If these elements aren’t handled correctly, your website may load but break internally.
1. Disable Caching, Optimization, and Security Plugins
Before migrating:
Turn OFF these plugin types:
- caching plugins (LiteSpeed Cache, WP Rocket, W3TC, Breeze)
- optimization plugins (Autoptimize, Asset CleanUp)
- security plugins (Wordfence, iThemes)
- firewall plugins (All-In-One Security, Sucuri)
- image optimization plugins (Smush, ShortPixel)
Why disable?
- Caches point to old server paths
- Minified JS/CSS break after transfer
- Security plugins block new server IP
- Firewalls can lock you out
- Page builders fail to load
This prevents migration conflicts.
If you’re unsure how plugins work, here’s a simple guide on WordPress plugins for beginners.
2. Update & Clean Up Themes & Plugins
Before migration:
- Update core (WordPress version)
- Update themes
- Update plugins
- Remove unused plugins
- Remove unused themes
- Delete old backups left by plugins
- Clear auto-generated caches
This ensures:
- improved compatibility
- smaller migration size
- faster transfer
- fewer conflicts on the new host
A clean site = smoother migration.
3. Export and Back Up wp-content Properly
Your wp-content folder contains everything custom:
- uploads
- themes
- plugins
- cache directories
- upgrade folders
- user-generated files
Before backing up:
Remove:
- /cache
- /backup
- /wflogs
- /debug.log
- /mu-plugins cache folders
- /wp-content/uploads/cache plugins
- old site clone folders
This reduces backup size and avoids transferring junk files.
4. Export the Database Safely + Check Table Integrity
WordPress database issues are common after migration because:
- serialized data breaks
- URLs remain unchanged
- table collation mismatches
- WooCommerce tables are large
- transients cause errors
Checklist:
- Use phpMyAdmin, WP-CLI, or plugin to export
- Check all tables selected
- Remove spam comments
- Clean transients (optional)
- Repair database tables (phpMyAdmin → Repair)
For WooCommerce:
Ensure these tables exist and export correctly:
- wp_woocommerce_orders
- wp_wc_order_stats
- wp_wc_order_product_lookup
- wp_wc_customer_lookup
This prevents order-loss issues.
5. Prepare Your wp-config.php for Migration
The wp-config.php file must be clean before moving.
Check:
- DB_NAME
- DB_USER
- DB_PASSWORD
- DB_HOST (old host uses localhost, new host uses IP or hostname)
- salts NOT changed during migration
- table prefix matches
- disable WP_CACHE in config before migration
This avoids “Error establishing a database connection”.
6. Check Theme & Plugin Compatibility With New Host
Especially important when:
- switching from Apache → LiteSpeed
- switching from shared hosting → VPS
- upgrading PHP versions
Check:
- minimum PHP requirements
- extensions (curl, zip, gd, mbstring, imagick)
- LiteSpeed compatibility
- WooCommerce + payment gateway requirements
This prevents white-screen, fatal errors, or conflicts.
7. Prepare WooCommerce (If Applicable)
For eCommerce sites:
- Pause checkout
- Pause order creation
- Export orders (CSV) for safety
- Take “before migration” snapshots
- Temporarily disable stock sync plugins
- Disable cron-based automations
WooCommerce is dynamic — frozen data ensures consistency.
8. Turn Off Scheduled Cron Jobs & Automations
Disable:
- wp-cron
- backup automations
- scheduled email newsletters
- LMS events
- subscription renewals
- membership workflows
Why?
Old server and new server double-trigger automations, causing duplicate email alerts, duplicate orders, or conflicting events.
9. Re-check Email Routing Settings
If email is hosted at:
- cPanel → export MX + DKIM
- Cloudflare → verify routing
- Google Workspace / Microsoft 365 → confirm no changes needed
Many migrations break email unintentionally because users overwrite nameservers.
This section prevents email downtime — a common fear.
URL Mapping & Redirect Planning

URL mapping ensures that every old URL safely redirects to the correct new URL after migration.
This prevents traffic loss, broken links, 404 errors, and ranking drops — which are the biggest SEO risks during a website migration.
A strong mapping plan makes your migration safer and ensures Google never “loses” your content.
1. Crawl and Export All Existing URLs (Full Site Inventory)
Before setting up redirects, export every URL on your current site:
- pages
- posts
- categories
- tags
- author archives
- custom post types
- attachment URLs
- pagination URLs
- shop URLs (if WooCommerce)
Tools to use:
- Screaming Frog
- Ahrefs Site Audit
- Semrush Site Audit
- RankMath/Yoast “Redirect Monitor”
- GSC → Page Index report
This becomes your Master Redirect Sheet, used throughout migration.
2. Identify URL Changes (Old → New)
Now compare your exported URLs with the new hosting/staging environment.
Common differences to watch for:
- category URLs (e.g., /category/seo/ → /blog/seo/)
- trailing slash inconsistencies
- uppercase/lowercase mismatches
- tag archive cleanup
- permalink changes
- product URL structure changes (WooCommerce)
- attachment URLs enabled/disabled
- HTTP → HTTPS
- www → non-www (or vice versa)
Even the smallest URL mismatch can cause a ranking drop — especially if the URL is ranking or receiving backlinks.
3. Create a Centralized URL Mapping Sheet
This sheet should include:
| Old URL | New URL | Redirect Type | Notes |
|---|---|---|---|
| /blog/wordpress-migration | /guides/wordpress-migration | 301 | Permalink changed |
This makes redirect execution clean, safe, and trackable.
4. Avoid Redirect Chains & Loops
A redirect chain is:
Old URL → Redirect → Another Redirect → Final URL
This slows down:
- Googlebot crawling
- user page loads
- SEO authority transfer
During migration:
Ensure:
- ❌ No 301 → 301 chains
- ❌ No 301 → 302 mistakes
- ❌ No loops
- ✔ All links go directly to the final destination
5. Prioritize High-Value URLs
Before applying redirects, identify critical URLs:
- pages with backlinks
- pages generating traffic
- category pages
- service/money pages
- WooCommerce product URLs
- key blog posts
These should be mapped and verified first.
Use:
- Ahrefs → Top Pages
- Search Console → Performance → Pages
- Analytics → Landing Pages
This ensures you protect your highest-value SEO assets.
6. Decide Redirect Strategy (Full Mapping vs Pattern Redirect)
Full mapping (manual)
Best for:
- older websites
- complex category/tag cleanup
- sites with many permalink changes
Pattern redirects (automatic)
Examples:
- /category/* → /blog/*
- /tag/* → /topics/*
- /product-category/* → /shop/*
This saves time for large sites.
7. Plan Redirect Execution on New Host
You can apply redirects:
a) via .htaccess
(best for Apache → LiteSpeed environments, including WP Swift)
b) via hosting panel
(cPanel → Redirects)
c) via WordPress plugin
RankMath, Yoast Premium, Redirection plugin
d) via CDN (Cloudflare Rules)
Useful for large-scale URL rewrites
e) via NGINX config
If using VPS
We will choose the method that fits WP Swift’s server (LiteSpeed-friendly).
8. Test Redirects Thoroughly
Once redirects are applied:
- test via Screaming Frog (list mode)
- test via browser
- test via incognito
- test without cache
- test mobile
Check for:
- ✔ correct redirect
- ✔ 301 status
- ✔ correct final URL
- ✔ no endless loops
- ✔ no broken links
9. Update Internal Links to New URLs (Very Important)
Redirects help Google — but internal links must point to final URLs.
Update:
- menus
- buttons
- blog links
- footer links
- breadcrumbs
- widget links
- homepage links
- internal CTAs
Use a plugin like:
- Better Search Replace
- Velvet Blues
- WP-CLI search-replace
This ensures your site structure remains clean.
Step-by-Step WordPress Migration (Execution Phase)

This is the stage where your WordPress website is actually moved from the old hosting server to the new one.
A correct execution ensures:
- no file corruption
- no database errors
- no broken layouts
- no login issues
- no downtime
- no SEO loss
Follow the steps in order — skipping even one can cause major issues later.
1. Move Your WordPress Files Safely (wp-content + core files)
There are 3 reliable methods to move files:
Method A — Manual Transfer (Recommended for accuracy)
- Go to File Manager (old host)
- Compress the entire public_html or site folder
- Download the ZIP file
- Upload ZIP into new host’s public_html
- Extract the file
- Confirm folder structure looks like:
- wp-admin
- wp-content
- wp-includes
- index.php
- .htaccess
Why this method:
- ✔ No plugin conflicts
- ✔ No file omissions
- ✔ Perfect for larger sites
- ✔ Ideal for WP Swift’s LiteSpeed environment
Method B — SFTP/FTP Transfer
- Connect FileZilla or WinSCP
- Download all files from old host
- Upload to new host
- Verify all file counts match
Only use if ZIP not possible.
Method C — Plugin-Based (Duplicator, WPvivid, UpdraftPlus)
Good for beginners but risky for:
- large sites
- WooCommerce stores
- page builders
- servers with execution limits
Use plugin method only if file size < 1.5GB.
2. Export Your WordPress Database Properly
Go to phpMyAdmin (old host):
- Select database
- Click Export
- Choose Quick OR Custom (recommended)
- Format: SQL
- Save the file
Important checks:
- No missing tables
- No incomplete exports
- No timeouts during export
- WooCommerce tables included
- Check collation (utf8mb4 recommended)
If using WP-CLI:
wp db export backup.sql
3. Create a New Database on the New Host
On WP Swift / cPanel:
- Go to MySQL Databases
- Create a new database
- Create a new DB user
- Assign ALL PRIVILEGES
Common mistake:
Users forget to grant privileges → results in “Error establishing a database connection”.
4. Import the Database Into the New Host
Using phpMyAdmin:
- Select new database
- Click Import
- Choose the SQL file
- Start import
- Confirm no errors
(e.g., duplicate keys, skipped tables, collation mismatch)
If using WP-CLI:
wp db import backup.sql
5. Update wp-config.php (Critical Step)
In the new host, edit wp-config.php:
- DB_NAME → new database name
- DB_USER → new username
- DB_PASSWORD → new password
- DB_HOST → often localhost, sometimes an IP/hostname
Leave everything else untouched.
IMPORTANT:
Remove or disable:
define(‘WP_CACHE’, true);
Caching must be re-enabled after migration.
6. Update Site URLs (If Domain Changes)
If the domain is changing or staging → live migration:
Use phpMyAdmin → SQL:
UPDATE wp_options SET option_value=’https://yourdomain.com’ WHERE option_name=’siteurl’ OR option_name=’home’;
Or WP-CLI:
wp search-replace ‘oldsite.com’ ‘newsite.com’ –all-tables
This fixes:
- homepage redirect loops
- login issues
- CSS/JS loading issues
7. Reconfigure Permalinks
Go to WordPress Admin → Settings → Permalinks:
- Select your preferred structure
- Click Save twice
This regenerates .htaccess and fixes 404 errors.
8. Install SSL Certificate
On new host:
- Activate AutoSSL
- Install new certificate
- Force HTTPS
- Run mixed content check
This prevents:
- browser security warnings
- broken images
- SEO issues
9. Configure Essential Settings on the New Host
Check:
- PHP version
- Memory limit (256M recommended)
- WP Cron (on or off as needed)
- File permissions:
- folders → 755
- files → 644
- DNS preview domain removed
- CDN integration disabled (temporarily)
10. Test the Site Before DNS Switch
Using temporary URL or hosts file preview, test:
- homepage
- inner pages
- login
- forms
- contact forms
- search pages
- category/tag pages
- WooCommerce checkout
- account pages
- speed
- console errors
Fix issues before DNS propagation to avoid confusion.
DNS Switching Without Downtime

DNS switching is the moment your website officially moves from your old hosting server to your new host.
If this step is done incorrectly, users may experience:
- temporary site outages
- mixed-content errors
- login issues
- missing pages
- email downtime
- inconsistent site versions across regions
A proper DNS strategy ensures every visitor sees the new server instantly, without ever seeing a broken page.
Below is the exact zero-downtime DNS process used by professional hosting engineers.
1. Use A Record Switching Instead of Nameserver Switching
There are 2 ways to point your domain to a new host:
Method 1: Change Nameservers (NOT Recommended)
- ❌ Full DNS propagation (slow)
- ❌ Email records can break
- ❌ All DNS records reset
- ❌ Higher downtime risk
Method 2: Update A Records Only (Recommended)
- ✔ Fast propagation
- ✔ No email disruption
- ✔ No DNS zone loss
- ✔ Zero downtime method
- ✔ Works perfectly with Cloudflare, cPanel & WP Swift
Always choose the A Record method for safe migrations.
2. Update DNS TTL to 300 Seconds Before Migration
TTL (Time-To-Live) decides how long DNS is cached globally.
Default TTL = 1–24 hours
Correct TTL for zero downtime = 300 seconds (5 minutes)
You should reduce TTL at least 24–48 hours before migration.
This ensures:
- global DNS switches quickly
- users don’t see the old version for long
- propagation issues are minimized
3. Identify the Correct DNS Records to Update
You must update:
- A Record for root domain (example.com)
- A Record for www (www.example.com)
Also check:
- AAAA records (IPv6)
- CNAME conflicts
- duplicate A records
- wildcard (*) entries
All old IPs must be replaced with new host IPs.
4. Switch the A Record to the New Hosting Server
Replace:
Old Server IP → New Server IP (WP Swift)
This single change starts the global propagation process.
Because TTL is already reduced to 300 seconds, most regions will switch within minutes.
5. NEVER Touch Email DNS Records
This is one of the most common migration mistakes.
Do NOT change:
- MX
- DKIM
- SPF
- DMARC
- TXT
- CNAME (email routing)
If you change nameservers instead of A Record → email goes down.
A Correct DNS switch protects email fully — even during migration.
6. Keep Both Servers Active for 24–48 Hours
Even if propagation is fast, some networks cache DNS longer.
That’s why:
- don’t delete old hosting
- don’t remove database
- don’t shut off old server
- don’t cancel old plan immediately
Both servers must stay live → ensures true zero downtime.
7. Test DNS Propagation Globally
After switching A Record, test using:
- DNSChecker
- WhatsMyDNS
- Cloudflare DNS tool
- Google DNS
- Quad9 DNS
Check these:
- ✔ root domain
- ✔ www version
- ✔ wildcard version
- ✔ A + AAAA
You’re looking for:
- the new IP
- no “unresolved” nodes
- no mismatch between regions
Propagation usually completes in 10–60 minutes when TTL is low.
8. Verify SSL Is Working on New Server
After DNS switches to the new host:
- AutoSSL triggers automatically
- Certificate installs for the new IP
- Ensure “Force HTTPS” is enabled
Test the site:
- homepage
- inner pages
- admin login
- WooCommerce checkout
- contact forms
If you see mixed content warnings → recache and rebuild.
9. Clear All Caches After DNS Switch
You must clear:
- WordPress cache
- LiteSpeed cache
- Cloudflare cache
- Browser cache
- Hosting-level cache
This ensures the new server shows the latest content to all visitors.
10. Confirm the New Server Is Serving All Traffic
You can confirm using:
Method A: PHP probe file
Create a file on the new host:
info.php <?php phpinfo(); ?>
Visit example.com/info.php →
If it loads → new server is live.
Method B: WordPress Site Health → Info → Server
Check server details → LiteSpeed (WP Swift).
Method C: Response headers
Look for:
x-litespeed-cache: hit server: LiteSpeed
This confirms you’re on the new environment.
Post-Migration Optimization

Once your WordPress site is fully migrated and DNS has switched to the new host, the next step is to optimize everything on the new server.
This ensures your website runs smoothly, loads faster, and avoids hidden issues that can appear right after migration.
These optimizations directly influence:
- speed
- user experience
- SEO health
- stability
- indexing
- conversions
If you’re using LiteSpeed (recommended), here are the key LiteSpeed performance advantages you’ll notice immediately.
1. Regenerate Permalinks & Flush Rewrite Rules
This fixes unexpected 404 errors after migration.
Steps:
- Go to Settings → Permalinks
- Click Save Changes (twice)
This refreshes .htaccess (on LiteSpeed/Apache) and resets all internal routing.
2. Re-enable Caching & Optimization Plugins
During migration you disabled caching — now you should re-enable it.
If using LiteSpeed (WP Swift):
- Enable LiteSpeed Cache
- Enable QUIC.cloud CDN (optional)
- Enable full page caching
- Enable CSS/JS optimization only after verifying pages load correctly
Important:
Do not reuse cache from the old server.
Let the new server generate fresh cache.
3. Fix Mixed Content Issues (Common After Migration)
Even after SSL activation, some URLs may still load as HTTP.
Use:
- Really Simple SSL
- LiteSpeed “Image Optimization → Fix Mixed Content”
- Search & Replace to replace http → https
Mixed content warnings break:
- images
- CSS
- JS
- rendering
And they reduce your trust score in Google.
4. Rebuild Critical Assets (Images, Thumbnails, CSS, JS)
Thumbnails
Use:
- Regenerate Thumbnails plugin
CSS/JS
- Clear optimization plugin cache
- Rebuild critical CSS (LSCache → Page Optimization → Critical CSS)
Images
- Compress images again (ShortPixel/Smush/LiteSpeed)
- Clear CDN (Cloudflare/BunnyCDN/QUIC.cloud)
This ensures full compatibility with the new server.
5. Check All Forms & Submission Points
Migration can break forms if:
- API keys change
- SMTP changes
- ReCAPTCHA keys fail
- Webhooks stop working
Test:
- Contact Form 7
- Elementor Forms
- WPForms
- Gravity Forms
- Fluent Forms
Also check:
- Lead notifications
- CRM integrations
- Email delivery (SMTP settings)
6. Reconnect Payment Gateways (For WooCommerce)
After migration, test:
- PayPal
- Stripe
- Klarna
- Apple Pay / Google Pay
- Bank Transfer
- COD
- Razorpay (if any)
Common issues include:
- Webhook mismatch
- API keys still pointing to old URL
- SSL blocking checkout requests
- 403 errors due to security plugins
A test purchase is recommended.
7. Reconfigure CDN & Firewall Settings
CDN should now point to the new host.
Check:
Cloudflare
- Purge all cache
- Re-enable APO (if used)
- Check SSL mode = Full
- Update A Records
BunnyCDN / QUIC.cloud
- Purge cache
- Rebuild image optimization
- Re-enable CDN linking
This prevents serving stale or broken content.
8. Optimize Server-Level Performance (LiteSpeed + NVMe)
On WP Swift, use:
- LiteSpeed server (auto-enabled)
- NVMe SSD storage
- HTTP/3 + QUIC
- LSCache plugin for WordPress
Enable:
- browser cache
- object cache (Redis if supported)
- server-level GZIP/Brotli compression
- ESI (for dynamic WooCommerce fragments)
This boosts TTFB and Core Web Vitals.
9. Fix Any Console Errors (JS, CSS, Mixed Content)
Open site → inspect → console.
Common post-migration errors:
- missing scripts
- missing files
- theme CSS not loading
- blocked resources
Fix by:
- clearing cache
- refreshing CSS/JS
- correcting URLs
- checking plugin conflicts
10. Clean Up Staging or Temporary Domains
Remove:
- temporary URLs
- cloned folders
- old staging sites
- deprecated subdomains
- leftover backup archives
This reduces storage load and security risks.
11. Activate Scheduled Tasks & Cron Jobs Again
Earlier, you disabled:
- wp-cron
- subscription renewals
- LMS schedules
- WooCommerce jobs
- backup automations
Reactivate them now to resume normal site operations.
12. Test Speed on the New Hosting (Benchmark Comparison)
Use:
- PSI
- GTmetrix
- WebPageTest
Compare:
- old TTFB vs new TTFB
- old LCP vs new LCP
- same for CLS, FCP
If optimized correctly, WP Swift’s:
- LiteSpeed server
- NVMe disks
- HTTP/3 protocol
will deliver a faster Core Web Vitals score.
SEO Validation After Migration

A website migration is not complete until Google fully recognizes your new hosting environment, updates its index, and successfully transfers ranking signals to the new URLs.
This SEO validation phase ensures:
- no hidden crawl issues
- no ranking drops
- no redirect misses
- no indexing conflicts
- no sitemap mismatches
- no canonical problems
It protects your search visibility and prevents SEO loss after migration.
1. Validate 301 Redirects (Highest Priority)
Use tools to check all redirects are working correctly:
Tools:
- Screaming Frog (List Mode → Upload URL list)
- Ahrefs → Site Audit → Redirects
- Chrome DevTools → Network → Status Codes
Check for:
- ✔ correct 301 response
- ✔ no 302 or 307
- ✔ no redirect chains
- ✔ no redirect loops
- ✔ old URLs not indexing
- ✔ new URLs accessible correctly
If even 5–10 redirects break, Google may:
- drop rankings
- create duplicate content
- index wrong versions
2. Resubmit Your XML Sitemap (Updated With New URLs)
Go to:
Google Search Console → Sitemaps
Submit:
https://yourdomain.com/sitemap.xml
Ensure:
- sitemap includes ONLY new URLs
- no old URLs
- no staging URLs
- no HTTP links
- correct canonical URLs
- correct last-modified dates
This helps Google re-crawl your site efficiently.
3. Request Indexing for Key Pages
Manually request indexing for high-value pages:
- homepage
- service pages
- blog posts
- WooCommerce product pages
- categories
Use:
Search Console → URL Inspection → Request Indexing
This accelerates ranking recovery and ensures Google fully recognizes your new hosting IP + server.
4. Monitor Coverage Report for Errors
GSC → Indexing → Pages
Look for:
- ❌ 404 errors
- ❌ redirect errors
- ❌ soft 404
- ❌ blocked by robots.txt
- ❌ alternate page with proper canonical
- ❌ “duplicate, Google chose different canonical”
You should have zero critical errors within the first week.
5. Check Canonical Tags Carefully
Canonical issues are common after migration:
- canonical pointing to old domain
- canonical pointing to staging URL
- HTTP canonical on HTTPS site
- duplicate canonical on archive pages
Fix via:
- SEO plugin (RankMath / Yoast)
- theme settings
- manual override
Canonical accuracy = ranking safety.
6. Validate Robots.txt Rules
Visit:
yourdomain.com/robots.txt
Check:
- ✔ sitemap link updated
- ✔ no disallowed important folders
- ✔ no staging/disallowed URLs
- ✔ no “disallow: /wp-admin/” issues (with exception for admin-ajax.php)
- ✔ no incorrect block rules added by plugins
Some security/migration plugins rewrite robots incorrectly — catch this early.
7. Reconnect Tracking & Analytics
Important tools that must be checked:
Google Analytics (GA4)
- correct measurement ID
- events firing
- ecommerce events firing
- link attribution correct
Search Console
- property verified (URL prefix recommended)
- correct sitemap showing
- correct canonical showing
Meta Pixel / GTM
- no broken tags
- purchase events firing
- form submissions tracked
A lot of WordPress sites lose analytics during migration due to caching or theme changes.
8. Check for Duplicate Content Issues
Use the following:
- Screaming Frog
- Sitebulb
- Siteliner
- Ahrefs Duplicate Content Report
Check for:
- ❌ old duplicate URLs still indexed
- ❌ http + https duplicates
- ❌ /index.php duplicates
- ❌ ?amp pages
- ❌ ?v=xyz WooCommerce parameter duplicates
This protects your ranking integrity.
9. Rebuild Internal Linking (If URLs Changed)
If URL structure changed:
- update navigation
- update footer
- update sidebar
- update breadcrumb
- update blog internal links
- update CTA buttons
Use Search/Replace for mass updates.
Internal linking = strong crawl signals after migration.
10. Monitor Rankings & Traffic for 7–14 Days
Use:
- Google Search Console
- Ahrefs
- Semrush
- Analytics → Landing Pages
Expected behavior:
- slight fluctuations in first 48 hours
- stabilization in 3–7 days
- improved speed = improved rankings
- improved TTFB with LiteSpeed/NVMe
- more reliable crawling due to better server
If there are drops, check:
- redirect issues
- canonical issues
- sitemap issues
- mixed content
- theme/plugin errors
11. Validate Mobile Performance
Mobile performance is often impacted by:
- CSS/JS regeneration
- cache rebuild
- CDN misconfiguration
Test using:
- PageSpeed Insights (mobile tab)
- Core Web Vitals → GSC
Expect improvements on WP Swift’s environment.
Troubleshooting Common WordPress Migration Issues

Even with a perfect migration plan, WordPress sites may face small issues depending on themes, plugins, DNS settings, or server configuration. This section helps you quickly identify and fix the most common post-migration errors.
Each issue is explained in simple terms with a practical fix.
1. “Error Establishing a Database Connection”
Cause:
- Wrong DB name
- Wrong DB user/password
- DB host incorrect
- Missing privileges
- Corrupted DB tables
Fix:
- Open wp-config.php
- Recheck DB_NAME, DB_USER, DB_PASSWORD, DB_HOST
- Assign “All Privileges” to DB user
- Repair database in phpMyAdmin
- If new host uses hostname (not localhost), update accordingly
2. White Screen of Death (Blank Page)
Cause:
- PHP version mismatch
- Broken theme
- Plugin conflict
- Wrong file paths
Fix:
- Rename /wp-content/plugins to disable plugins
- Switch to default theme
- Set PHP version to 8.0–8.2 (recommended)
- Enable WP debug mode to view error logs
3. 404 Errors After Migration
Cause:
- Permalink structure not refreshed
- .htaccess not updated
- Missing rewrite rules
- Page slug changed
Fix:
Go to Settings → Permalinks → Save twice
This regenerates your .htaccess file.
4. Mixed Content / SSL Not Working
Cause:
- Hardcoded http:// URLs
- CDN or image URLs on HTTP
- Old domain still referenced
Fix:
- Enable Really Simple SSL
- Run database search-replace (http → https)
- Purge CDN cache
- Purge browser cache
5. Theme or Page Builder Elements Broken
Especially in Elementor, Divi, WPBakery.
Cause:
- Missing CSS files
- Minified CSS from old server
- CDN paths outdated
- Elementor CSS not regenerated
Fix:
Elementor → Tools →
- Regenerate CSS
- Sync Library
- Enable Safe Mode
For Divi:
- Clear Static CSS File Cache
6. WooCommerce Checkout Not Working
Cause:
- API keys pointing to old domain
- Caching conflicts
- Mixed content blocking payment scripts
- Missing Webhooks (Stripe, PayPal)
Fix:
- Reconnect payment gateways
- Regenerate Webhooks
- Disable caching on checkout
- Enable “Force SSL Everywhere”
- Clear LiteSpeed cache
7. Images Not Loading After Migration
Cause:
- Uploads folder missing
- Wrong file permissions
- CDN links not updated
- SSL mixed content
- Wrong domain in database
Fix:
- Reupload uploads folder
- Set permissions: 755 (folders), 644 (files)
- Use search-replace tool
- Regenerate thumbnails
8. CSS/JS Not Loading (Broken Layout)
Cause:
- Incorrect URLs
- Missing minified files
- Old caching
- Corrupted .htaccess rules
Fix:
- Disable/minify from optimization plugins
- Purge caches
- Rebuild CSS/JS from caching plugin
- Check .htaccess for missing rewrite rules
9. Email Not Sending or Receiving
Cause:
- MX record overwritten
- SPF/DKIM not applied
- SMTP settings broken
- DNS propagation incomplete
Fix:
- Check MX records in DNS
- Verify SPF & DKIM
- Update SMTP plugin credentials
- Avoid changing nameservers unnecessarily
10. “Too Many Redirects” or Redirect Loop
Cause:
- Wrong site URL in DB
- Forced HTTPS conflict
- Old cache
- SSL plugin conflict
Fix:
- Update siteurl + home in wp_options
- Disable SSL plugins temporarily
- Clear all caches
- Re-enable SSL from hosting panel
11. Slow Loading After Migration
Cause:
- Cache not rebuilt
- Old CDN still serving files
- DNS Propagation delay
- Server-side optimization missing
Fix:
- Enable LiteSpeed Cache
- Clear all caches
- Rebuild critical CSS
- Enable object cache
12. Plugins Not Working
Cause:
- Missing PHP extensions
- Old plugin versions
- Incompatible caching
- License key mismatch
Fix:
- Update plugin
- Install required PHP extensions
- Re-enter plugin license
- Disable optimization temporarily
13. Admin Login Issues
Cause:
- Wrong URL in database
- Conflicting security plugins
- Cookie/salt mismatch
Fix:
- Reset site URL
- Disable security plugins
- Regenerate salts via wp-config
14. Staging Site Showing Instead of Live Site
Cause:
- Search-replace incorrect
- DNS cache still pointing to staging
- CDN caching old content
Fix:
- Clear all caches
- Re-run search-replace
- Update CDN origin
Tools That Make Migration Easier
Although a manual WordPress migration gives you maximum control, using the right tools can save time, reduce errors, and simplify the entire process. Whether you’re migrating a small blog, a WooCommerce store, or an enterprise WordPress site, the tools below help automate backups, file transfers, database operations, and URL updates.
These are the safest, most reliable, and widely used tools for WordPress migration.
1. WordPress Migration Plugins (Beginner-Friendly)
a) Duplicator
Best for small to medium-sized sites.
Features:
- One-click site package
- Easy installer script
- Database + files combined
- Works well for simple migrations
Avoid using when:
- Site size > 1.5 GB
- WooCommerce is active
- Shared hosts with low limits
b) UpdraftPlus
Best for scheduled backups + incremental migrations.
Features:
- Cloud backups (GDrive, Dropbox, S3)
- Incremental backup
- Fast restore option
Great choice for blogs and content-heavy sites.
c) All-in-One WP Migration
Beginner-friendly, drag-and-drop.
Pros:
- Simple interface
- No technical knowledge needed
Cons:
- Free version has file size limit
- Large sites require paid extension
d) WPvivid Backup & Migration
Best free plugin for balanced performance.
Features:
- No size limit
- Auto-migration features
- Full + incremental backups
- Very stable for shared hosting
2. Hosting-Level Tools (Most Reliable Method)
a) cPanel Full Backup / JetBackup
Perfect for:
- cPanel → cPanel migrations
- shared hosting environments
- email + DNS zone + databases combined
JetBackup does:
- account clone
- restore
- incremental backups
This is the safest method for full account moves.
b) Softaculous WordPress Manager
Softaculous has built-in WP migration tool:
Features:
- clone site
- push to live
- staging
- domain change support
Useful for medium-sized sites.
3. WP-CLI (Professional Method)
WP-CLI is a command-line tool for WordPress developers and advanced users.
Use WP-CLI when:
- site > 2GB
- WooCommerce active
- custom plugins/themes
- need accuracy in search-replace
Common commands:
Export database:
wp db export backup.sql
Import database:
wp db import backup.sql
Search-replace domain:
wp search-replace ‘oldsite.com’ ‘newsite.com’ –all-tables
Clear cache:
wp cache flush
WP-CLI ensures zero corruption and full precision.
4. File Transfer Tools
a) SFTP Clients
- FileZilla
- WinSCP
- Cyberduck
Use when:
- large uploads
- manual approach
- need full control
Check that file count matches after transfer.
b) cPanel File Manager / DirectAdmin File Manager
Best for:
- compressing folders
- uploading ZIP files
- extracting files
Much faster than SFTP for large sites.
5. Database Management Tools
phpMyAdmin
Most common tool for exporting/importing SQL databases.
Tips:
- Use Custom Export
- Enable “Add DROP TABLE”
- Avoid timeouts
- Check table collation
Adminer
Lightweight alternative to phpMyAdmin.
Best when:
- large DB import
- shared hosts timeout
- need quick fixes
6. Cloudflare & DNS Tools
Cloudflare DNS
Useful for:
- A Record switching
- Zero-downtime DNS management
- Free SSL
- Firewall and caching
DNSChecker / WhatsMyDNS
Used for global propagation checks.
Ensures users see the correct server instantly.
7. Search & Replace Tools (Critical for URL Fixing)
Better Search Replace
Use for:
- fixing old URLs
- fixing media paths
- correcting internal links
- updating serialised data (Pro version)
WP-CLI Search Replace
Fastest and most reliable method for developers.
8. Developer-Level Tools (Optional but Powerful)
rsync
Server-to-server file copy:
rsync -avz /old/ /new/
SSH
Fastest way to upload/download files.
Git / Version Control
Used when developers manage custom themes/plugins.
WP Swift Advantage — Migrate for $1 With Expert Support
Migrating a WordPress website becomes dramatically easier when your hosting provider actively supports the process. WP Swift is designed specifically for fast, safe, and zero-downtime WordPress hosting, making it an ideal environment for smooth migrations — even for beginners.
Here’s why thousands of WordPress users prefer moving their sites to WP Swift.
1. Free Expert Migration Included
WP Swift’s technical team handles the entire migration for you — including:
- full site transfer
- database import
- DNS configuration
- SSL setup
- redirects (if required)
- WooCommerce-safe migration steps
- staging setup
This ensures you don’t deal with:
- ❌ file errors
- ❌ broken URLs
- ❌ DNS misconfiguration
- ❌ downtime
- ❌ plugin conflicts
Everything is handled professionally.
2. Zero-Downtime Guaranteed
Your site stays live throughout the migration process.
WP Swift uses:
- TTL control
- A-Record switching
- blue/green staging setup
- dual-server activation
- DNS propagation monitoring
This ensures visitors never see:
- “site down”
- “500 error”
- “maintenance mode”
Your migration remains smooth, uninterrupted, and fully stable.
3. LiteSpeed Enterprise Server (Much Faster Than Apache/NGINX)
Unlike most shared hosts that still use Apache or NGINX, WP Swift runs on LiteSpeed Enterprise, which delivers:
- faster TTFB
- superior caching
- automatic compression
- better concurrency
- stronger WordPress optimization
Perfect for:
- blogs
- Elementor sites
- WooCommerce stores
- membership sites
- high-traffic websites
4. NVMe SSD Storage for Instant Page Loads
NVMe drives significantly outperform SATA SSDs.
You get:
- faster database queries
- quicker asset delivery
- smoother page builder performance
- reduced CPU usage
- instant WooCommerce response times
Your site becomes noticeably faster right after migration.
5. 1-Click Staging, Backups & Restore
WP Swift offers built-in tools for:
- staging environments
- on-demand backups
- auto-backup scheduling
- quick restores
This ensures your site stays safe even after migration — no technical work needed.
6. Secure Email, DNS & Domain Handling
WP Swift ensures email never goes down during migration:
- MX protection
- DKIM/SPF/DMARC setup
- DNS zone isolation
- zero-downtime A-record switching
- free AutoSSL installation
For businesses, email stability is as important as website uptime.
7. WooCommerce & High-Traffic Sites Supported
WP Swift is optimized for dynamic WordPress websites:
- Redis object caching
- LiteSpeed ESI (Edge Side Includes)
- database optimizations
- WooCommerce page caching rules
- queue handling for high traffic
Your store remains stable even during traffic spikes.
8. $1 First-Month Hosting — Ideal for Migration Testing
You can migrate your website safely, test everything for 30 days, and only pay $1 for the first month.
This makes WP Swift:
- safe
- affordable
- beginner-friendly
- low-risk
- perfect for testing speed improvements
After test month, you can continue or scale as needed.
9. Personalized Support (Not Generic Tickets)
WP Swift offers:
- one-to-one migration help
- technical troubleshooting
- caching & performance optimization
- WooCommerce checkout fixes
- DNS & domain help
- plugin/theme compatibility review
This is a level of support shared hosting companies usually do not provide.
Frequently Asked Questions (FAQs)
How long does a full WordPress website migration take?
A standard WordPress migration takes 30–90 minutes, depending on the site size.
Large WooCommerce stores or media-heavy websites may take 2–4 hours due to database size and product images.
Will my website experience downtime during migration?
No — not if you follow a zero-downtime migration method using:
- TTL reduction
- A record switching
- staging environment
- dual-server activation
This ensures continuous uptime.
Will my SEO rankings be affected after migration?
If you implement:
- proper 301 redirects
- updated sitemap
- correct canonical tags
- no broken links
- proper SSL
- post-migration SEO validation
…your rankings will remain stable or improve due to faster hosting.
Do I need to change my domain if I move hosts?
No.
Migrating to a new host does not require a domain change.
The domain stays the same — only the server changes.
What is the safest way to migrate a WordPress website?
The safest method is:
- Full backup
- Create staging copy
- Test functionality
- Switch DNS using A Records
- Validate redirects
- Rebuild caching
- Verify SEO settings
This prevents downtime and data loss.
Do I need to back up my email before migration?
Yes — only if your emails are hosted on the old server.
If you use Google Workspace or Microsoft 365, no extra steps are needed.
Does WooCommerce require special migration steps?
Yes.
WooCommerce is dynamic, so you should:
- pause checkout
- freeze orders
- export orders before migration
- test payment webhooks
- validate stock sync
This prevents order-loss or incorrect stock levels.
What should I do if the new site shows a white screen after migration?
This usually indicates:
- plugin conflict
- PHP version mismatch
- theme issue
Steps:
- rename plugins folder
- switch theme
- enable WP debug
- update PHP version on new host
How do I know DNS propagation is complete?
Use tools like:
- DNSChecker
- WhatsMyDNS
Once all global nodes show the new server IP, propagation is complete (usually within 5–30 minutes with TTL=300).
Can I delete my old hosting account immediately after migration?
No.
Keep your old hosting active for 24–48 hours after DNS switch to avoid:
- partial propagation issues
- email delays
- regional cache lags
- missing orders/comments (WooCommerce)
Is plugin-based migration safe for large sites?
Not always.
Plugins struggle with:
- sites over 1.5–2GB
- WooCommerce tables
- custom-coded themes
- serialized data
- low hosting PHP limits
Manual or hosting-assisted migration is safer.
Should I disable caching before migrating?
Yes.
Caching plugins can cause:
- old content loading
- incorrect paths
- redirects
- white screen issues
- broken page builder styling
Re-enable caching after migration is complete.
Why do some pages show mixed content after migration?
This happens when old http:// URLs remain in:
- database
- CSS/JS files
- CDN or image URLs
- theme options
Run a search-replace + purge CDN to fix it.
Is migrating from Apache to LiteSpeed safe?
Yes — 100% safe.
LiteSpeed fully supports .htaccess, WordPress rewrites, and improves:
- TTFB
- Cache efficiency
- WooCommerce performance
It’s a recommended upgrade.
What if my new host uses a different PHP version?
Most WordPress sites run smoothly on PHP 8.x today.
If a plugin/theme breaks:
- switch to PHP 7.4 temporarily
- update theme/plugin
- retest
- switch back to PHP 8.x
CONCLUSION
Migrating a WordPress site doesn’t have to be risky or complicated. With the right planning, proper URL mapping, safe DNS handling, and careful SEO validation, you can move your website without losing traffic, orders, or search rankings. This guide walked you through every essential step — from planning and execution to optimization and troubleshooting — ensuring your migration stays stable and error-free.
Whether you’re switching hosts for better performance, improved security, or faster speed, the right hosting environment makes a massive difference. A reliable platform ensures zero downtime, fewer migration issues, and better long-term performance for your WordPress site.
If you want a safe, fully-handled migration, WP Swift offers free expert migration, LiteSpeed Enterprise, NVMe storage, and a $1 first-month hosting plan — making it the easiest and safest way to move your WordPress website without downtime.